

I tried many different combinations of papers and how I added the water and color. By far, the best results I got were using watercolor paper.
You'll need water color paper, water bottle to spritz, reinkers, aqua painters, coarse salt (I used Mediterranean Sea Salt).
I used two colors here - Emerald Envy on the top half, and Tranquil Tide on the bottom half.
Here is a quick version of what I did:
1. Wet down both sides of your watercolor paper, with a water bottle spritzer. BOTH sides. It's important. Otherwise, the paper curls up and all your ink and salt will slide off. Wetting both sides evens out the curl, so the paper stays flat-ish.
2. Put a few drops of reinker on a silicone sheet. Add a few drops of water from your aqua painter. It's hard to tell how dark or light it will end up. Swirl that around with your aqua painter.
** Since I used two colors, I had two puddles on my sheet, and used two separate aqua painters, so that I could work quickly.
3. Spritz your water color paper once more for good measure, then paint on your reinker on the paper, covering it. **Since I used two colors, I painted Emerald Envy on the top half first. When that started bleeding down, I put a paper towel on the bottom half. Get the top half colored to your liking, and spritz with more water.
4. Now, spritz the bottom half of your paper down with the water bottle, and paint on the Tranquil Tide reinker (same as you did in the previous step). Work quickly.
5. Spray the whole paper down again, and then liberally dump on your salt.
6. Don't touch! Let it sit over night to dry, or you could use your heat tool.
7. Brush the salt off. You make need to run a sanding block over the whole thing, very gently, if there are any bits of salt stuck.
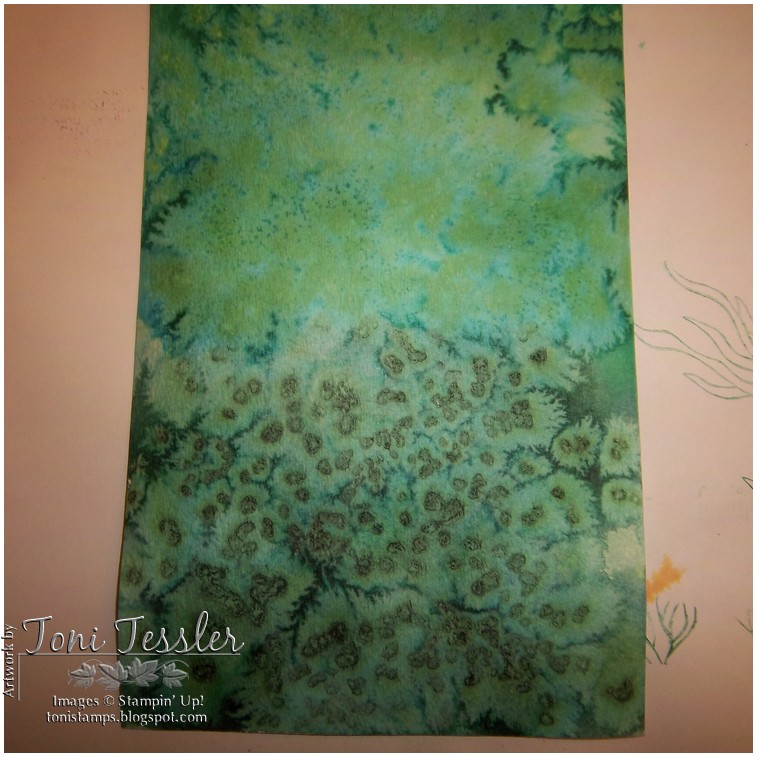
Notice how the ink colors reacted differently to the salt. Emerald Envy is on the top - the salt made the color separate and bleed out. Tranquil Tide is on the bottom - the salt made it spread out like amoebas but left dark spots behind. I like the differences!
Close-up picture that shows more of the different reactions. I stamped using only Tranquil Tide and Emerald Envy.

One other thing to make a note of - assembly. The watercolor paper gets VERY warped when it dries. You'll need a strong adhesive to attach it to the card stock. I use a combination of Sticky Strip (red line tape) and Tombow Liquid glue.
You may notice that these stamps are all retired...I kept them around because I love them! You'll just have to substitute with something else in your stash.
I stamped the greeting on a scrap of Hello Honey (also retired) card stock, because it matches the steno pad covers perfectly.
Stampin' Up supplies you'll need to create this:
Stamps: By the Tide, By the Seashore, Itty Bitty Backgrounds, Watercolor Wishes card kit (ALL retired, sorry)
Ink: Emerald Envy, Tranquil Tide
Paper: Emerald Envy, Tranquil Tide, Hello Honey (retired), water color
Other: 2 1/4" circle punch, Starburst punch, Aqua Painters, Stampin' Spritz bottle, Emerald Envy and Tranquil Tide reinkers, Sticky Strip, Tombow Liquid Glue, Mediterranean Sea Salt (coarse)
I hope you enjoy my note pad idea.
Thanks for visiting, and Happy stamping!
Toni
Order your supplies from my on-line store here, 24/7. Thank you!
No comments:
Post a Comment