Happy Saturday Crafty Peeps!
I had a GREAT time sharing some pretty awesome gift packaging ideas on Thursday night. One of my projects uses non-holiday paper to remind us that you can change up ANY paper/color/ribbon/stamp to copy the design of something to suit your needs. Plus, we all have someone in our circle with a December birthday - don't forget that they like cards and wrappings that are NOT holiday-themed. :) Let's take a look...
I'm also including pictures of the patterns that I drew out.
Just a reminder that I am generally Live on-line every Thursday at 8:00pm ET. I am streaming to BOTH YouTube and Facebook simultaneously.
If you are not able to catch me live, you can watch over on YouTube. If the picture does not appear below, you can click HERE to get to it on YouTube.
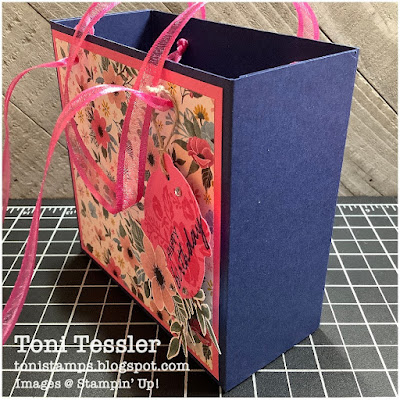
First project is a gift bag made out of an entire sheet of 8 1/2" x 11" cardstock. Cool, right?! Simple scoring and cutting makes assembly pretty quick (pattern below). Add some coordinating cardstock and Fitting Florets designer series paper layers. (Don't forget that this Fitting Florets Paper is only available through Jan 4, while supplies last!) Add some ribbon handles and a tag!
Paper measurements:
- Night of Navy: 8 1/2" x 11". See pattern below for scoring.
- Polished Pink: (2) 4 1/4" x 4 1/4"
- Fitting Florets Designer Series paper: (2) 4" x 4"
- Polished Pink: scrap to make tag
The tag is made using the Shaded Summer stamp set. Stamp one of the flower clusters on Polished Pink cardstock, using Polished Pink ink. Then stamp the greeting right on top of it, using Night of Navy ink. Punch out with the Lasting Label punch.
Hand-cut a flower cluster or two, from a different print out of the Fitting Florets designer series paper pack and glue it to the tag. Finish off with some Rhinestones.
Here's a side view of the box:
For our pattern: Score along the short side at 2" and 6 1/2". Turn paper once and score along the long side at 4 1/2", and 6 1/2". Watch the video for the tab cutting and assembly.
This is really a pretty roomy little box. Finished size is 4 1/2" x 4 1/2" x 2".
Stamps: Shaded Summer
Ink: Polished Pink, Night of Navy
Paper: Night of Navy, Polished Pink, Fitting Florets Designer Series paper
Other: Lasting Label punch, Polished Pink 3/8" Open Weave ribbon, Basic Rhinestone Jewels
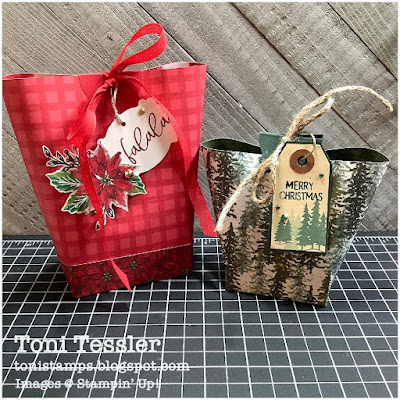
Next up is a Box in a Bag! Sounds kind of kooky, but you make a teeny tiny little box first, then wrap your designer series paper around the box. I already had the shorter one made, and just had to finish the tag. The short one uses a 4" x 12" piece of designer series paper. The taller one uses a 6" x 12" piece. Pretty roomy! You'll need some Tear & Tape, Scor-Tape, Sticky Strip - whatever strong tape you like to use.
I did not draw out a pattern for these. I'm providing the cardstock size and scoring measurements for BOTH size boxes below. Watch the video for assembly instructions.
- Cherry Cobbler: 4 1/4" x 5 1/2", scored at 1" on each side. This makes a 2 1/4" x 3 1/2" x 1" box.
- Gingham Cottage designer series paper (Real Red print): 6" x 12"
- Boughs of Holly designer series paper (smaller poinsettia print): 1" x 12"
- Real Red: scraps to punch out (2) Lasting Labels
- Basic White: scrap to make tag, punch with Lasting Label punch
- Boughs of Holly designer series paper: hand-cut one poinsettia
Finish off with Gilded Gems, Red ribbon, and Linen Thread
Since the small box was already made, I'm giving you the measurements, but did not show this assembly on camera. The only thing I made for this one was the tag.
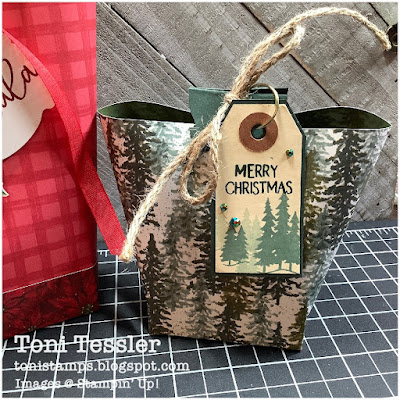
Evergreen Trees Box in a Bag Paper measurements:
- Evening Evergreen: 4 3/4" x 4 3/4", scored at 1" on each side. This makes a 2 3/4" x 2 3/4" x 1" box.
- Boughs of Holly designer series paper (trees print): 4" x 12"
- Evening Evergreen: scraps to punch out (2) Lasting Labels, and layer the tag
- Small manilla tag came from the car shop - I had to get a new tire on Monday. :(
Finish off with some In Color Rhinestones, and Silver-Threaded Twine.
Stamps: Framed & Festive, Peaceful Deer
Ink: Cherry Cobbler, Soft Succulent, Evening Evergreen
Paper: Cherry Cobbler, Real Red, Evening Evergreen, Basic White, Gingham Cottage and Boughs of Holly designer series papers
Other: Lasting Label punch, Red Cotton ribbon, Linen Thread, Silver-Threaded Twine, Gilded Gems, 2021-2023 In Color Rhinestones, Manilla tag
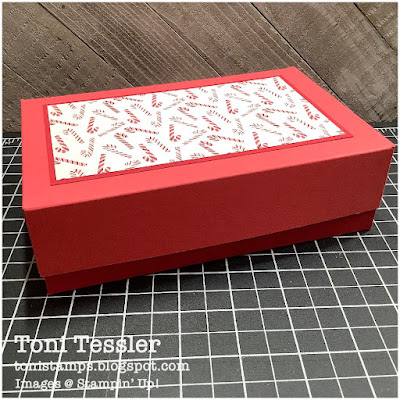
Here are the patterns for each piece. I started figuring my measurements with the BOTTOM box. I wanted to use an entire sheet of 8 1/2" x 11", and I wanted it to be 2" tall. Easy. Score at 2" on all sides.
Note my shorthand in the top right corner. > = + 1/16" That means ADD 1/16" to measurements...so my Top piece really needs to be 7 9/16" x 10 1/16".
If I ever use < , that means SUBTRACT 1/16". When you are making a two-piece box like this, the two pieces cannot have the same base size. The bottom has to be a smidge smaller than the top.
Score all sides of your TOP box at 1 1/2" all around.
Paper Measurements (for the top of the TOP box):
- Real Red: 3 1/2" x 6"
- Sweetest Christmas Designer series paper: 3 1/4" x 5 3/4"
I would finish this box off with some ribbon tied around it, and a tag. You could also stamp some sort of focal image to layer on the top of the box.
Paper: Real Red, Sweet Sorbet, Sweetest Chrsitmas Designer Series Paper
I hope these gift packaging ideas are helpful for you - whether you're packaging things for the holidays, or any other special occasion. Change up your papers and colors to what you need!
Tune in this coming Thursday for some "gifty" ideas. These are usually small-ish things you can make to give out, or even sell at craft fairs.
Click on my Workshop of the Month page for full details of how you can get a Make-n-Take packet for the December workshop (which aired last week).
Thanks for visiting, and Happy stamping!
Toni
Shop here for your Stampin' Up products, 24/7. Thank you for your support!
Paper Pumpkin Monthly Craft Kits
Facebook Page: @tonistampsandmore
Facebook Sharing Group: Toni's Stamping & Sharing Group
Instagram: tonistampsandmore
Pinterest: tonistamps
YouTube Channel: tonistamps
#tonistamps #stampinup #diygiftpackaging #boxinabag #giftbox
Gift certificates available anytime!


No comments:
Post a Comment